
You don’t have to spend time scoring a buck to impress your pals. Just meet them at the bar, buy them a round of drinks, and tell themhow you brought home that trophy-winner. Even if they’re not excited over your accomplishment, they’ll feel obligated to go with you on the journey in consideration of the cold beer you have gifted.
But we like to know just how well we have done at something by assigning a number to the result. This is part of the reason why students taking the Medical College Admission Test want to receive numeric scores instead of “Great job!,” “Good effort!” and “Give up!”
You may take a laid-back approach to scoring a buck by merely counting the number of points on its antlers. For example, “I bagged a six-pointer” simply means that your buck’s antlers end in six points. Officially scoring a buck, however, is somewhat more complicated. You have to take a few measurements. However, the process is simple enough once you’ve gone through it a few times.
Scoring A Buck
Tools Needed
- Length of wire cable (to help measure curving points and main beams only)
- Yardstick or folding ruler (to get accurate measurements from the wire)
- 1/4” wide flexible steel tape (aka tape measure)
- An official Boone and Crockett Club score sheet for typical or non-typical* whitetail (or the digital score sheet if you don’t have access to a printer)
*A non-typical buck has asymmetrical antlers, which may be too convoluted for the layman to score accurately. The following instructions are for scoring a typical whitetail’s antlers.
Note that we’re recording all measurements to the nearest 1/8 of an inch throughout this entire process.
Step 1: Count Your Points
Count and record the number of points on both antlers, matching each normal point on one antler to its corresponding point on the other antler. Then count and record all abnormal points on each antler (i.e. points which do not match to any points on the other antler), skipping any abnormal points that are shorter than 1”.
Step 2: Measure The Outer Points

When measuring the outer points, be sure to measure the outermost points of the antlers and the spread of the beams.
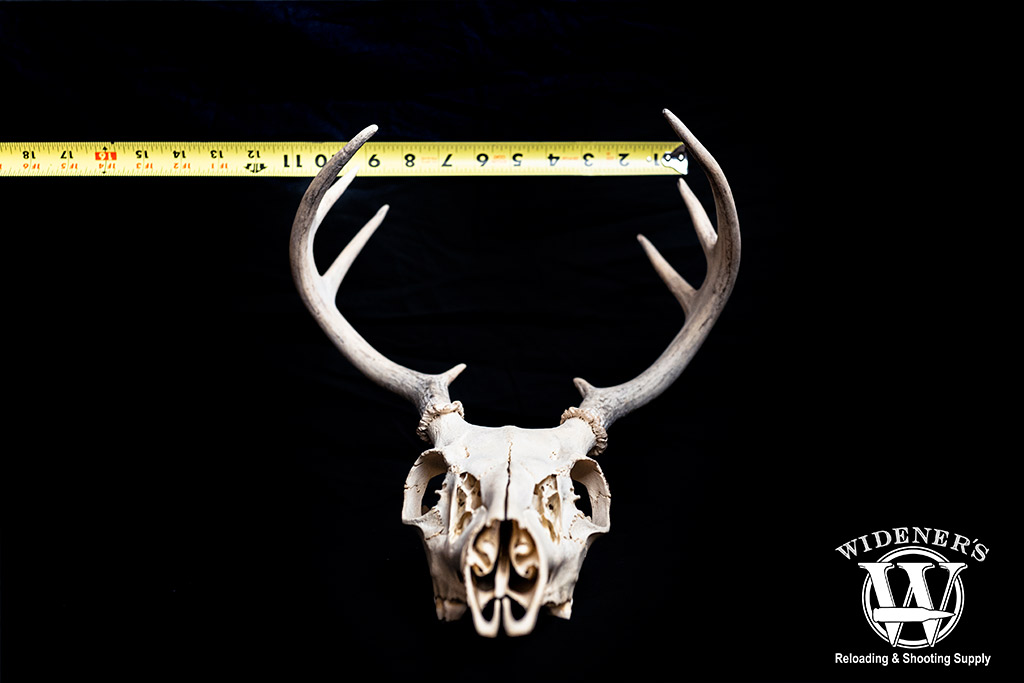
Measure and record the distance between the two outermost points of the antlers (the tip to tip spread). Then measure and record the greatest spread (the distance between the two outermost parts of the antlers, which is typically between the two main beams but which may include an abnormal point). Make certain to keep the tape measure perpendicular to the length of the skull during this step, as well as parallel to the top of the skull.
Step 3: Measure The Inside Spread
Measure the inside spread between the two antlers, i.e. the distance between the insides of the outermost parts of the antlers. This number is your spread credit. You will use it to record your total score provided that it is not longer than the length of the main beam. If your spread credit is longer than the length of the main beam, then that main beam length will instead be used to tally the total score.
Step 4: Measure Abnormal Point Length
Measure the total lengths of all abnormal points on both antlers (i.e. points which don’t match to points on the other antler).
Step 5: Measure Antler Beam Length

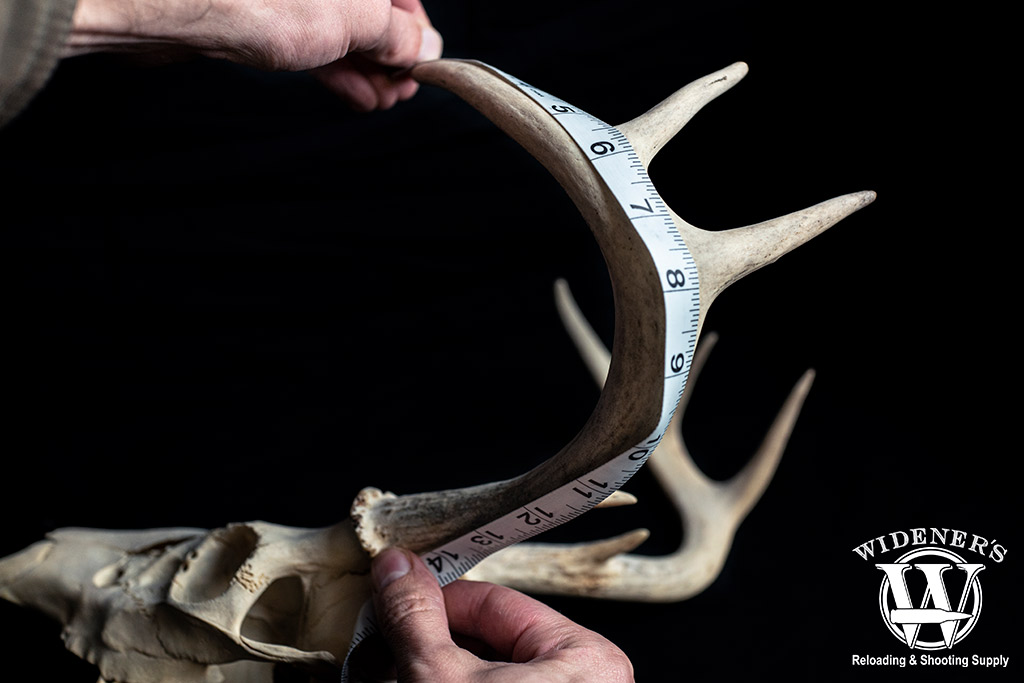
When measuring antler beam length, measure the beam from bur to tip on the outside of the antler.
Measure the entire length of the main beam of one antler starting from its base (aka bur) and ending at its tip. This is where a length of wire comes in handy, as a rigid tape measure will not adequately conform to the contour of a curving antler. Once you have recorded the entire length of one antler’s main beam, measure and record the length of the other.
Step 6: Measure Point Length
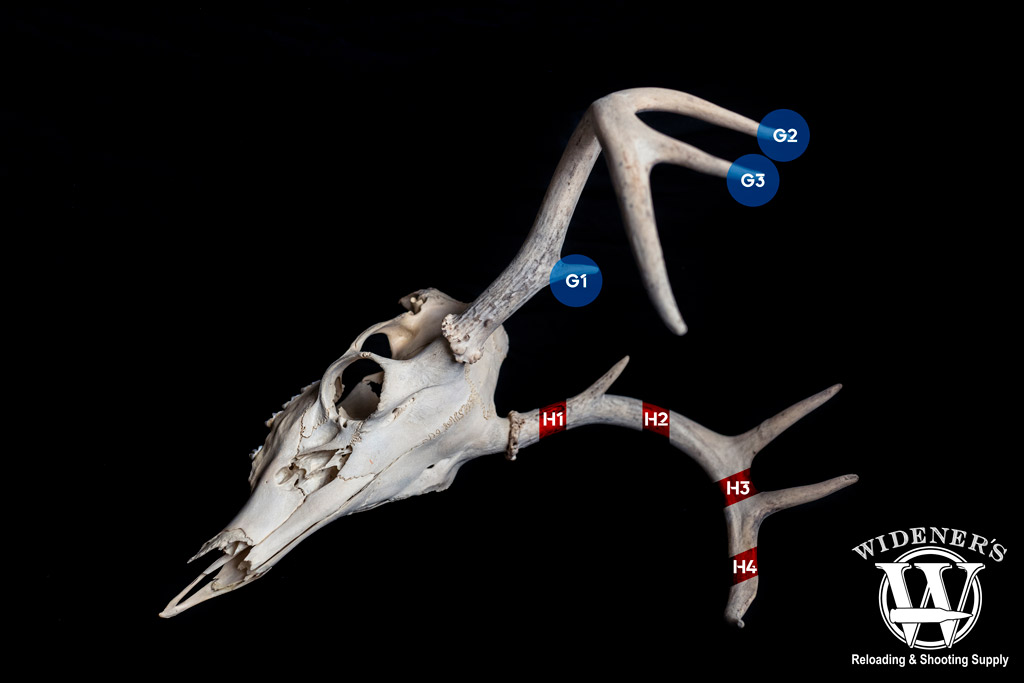
Measure and record the length of each point (G-1 through G-7 on the score sheet). Begin measuring where the point diverges from the main beam and end at the tip, taking care to follow the curvature of the point. Measuring longer points with the aid of your flexible wire is advisable.
Step 7: Estimate Antler Mass
This step is used to estimate the mass of the antlers and involves measuring their beams’ circumferences at four zones. Referring to the illustration on the scoring sheet, measure and record the circumferences at the smallest places between the:
- Bur and first point (H-1)
- First and second points (H-2)
- Second and third points (H-3)
- Third and fourth points (H-4)
Repeat this step for the second antler.
Step 8: Determine Antler Symmetry
You will now begin determining how symmetrical your whitetail’s antlers are. First, tally the number of abnormal points on each antler. Record the sum in cell E of the score sheet. Next, find the differences between each corresponding G measurement, i.e. G-1 left minus G-1 right. Then do the same for all corresponding H measurements, i.e. H-2 left minus H-2 right. Add the differences together to get your total deduction number.
Step 9: Adding Up Your Score
In the boxes at the bottom left of the score sheet, add the spread credit (or the length of the longer main beam, if the spread credit exceeds it) and the sums of columns 1 and 2. Then subtract the sum of column 3, and voila – you have officially scored your buck.
Boone and Crockett Club Submission

Remember, you’ll always have a minimum of four antler mass measurements (H-1 to H-4), no matter how many points (G-1 to G-3) the antlers have.
The Boone and Crockett Club does not require that you report your buck’s score. Although, you may wish to do so if you have bagged a mighty fine specimen. Note that official measurements must be taken once the antlers have air-dried at a habitable room temperature for at least 60 days after the buck drew its last breath. The 60-day drying period can only begin once the trophy has been removed from the freezer or boiling pot. Assuming of course that you have used either method.
If you submit your information to the Boone and Crockett Club, they will use it to generate valuable data. The data is used for game management and conservation efforts. You may just take satisfaction from knowing that your trophy will be recorded for all of history!


